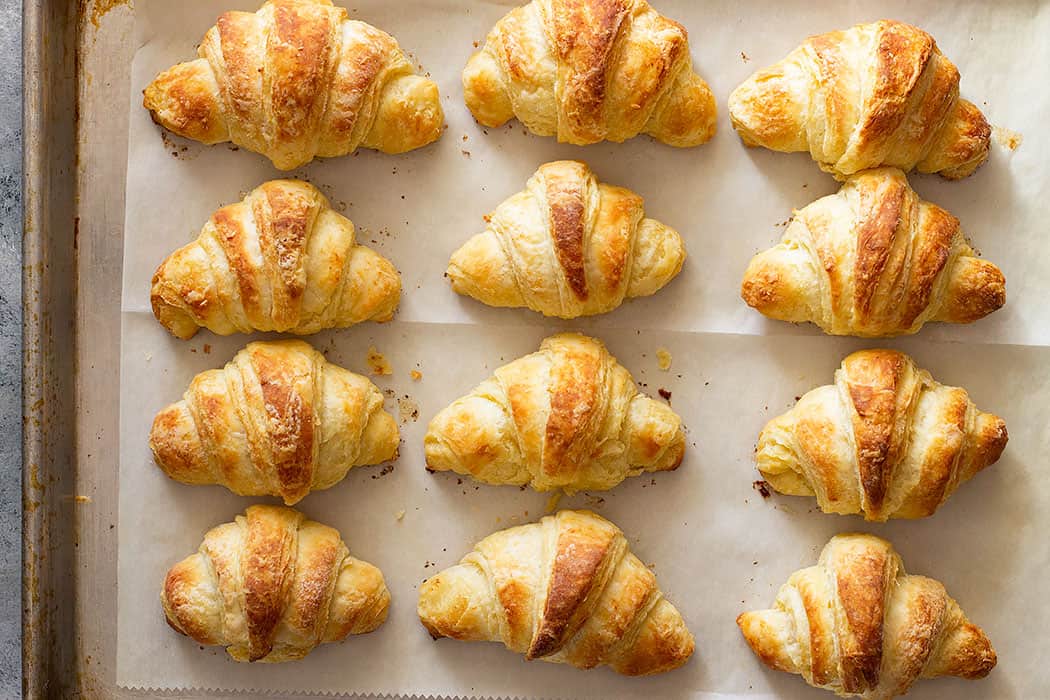
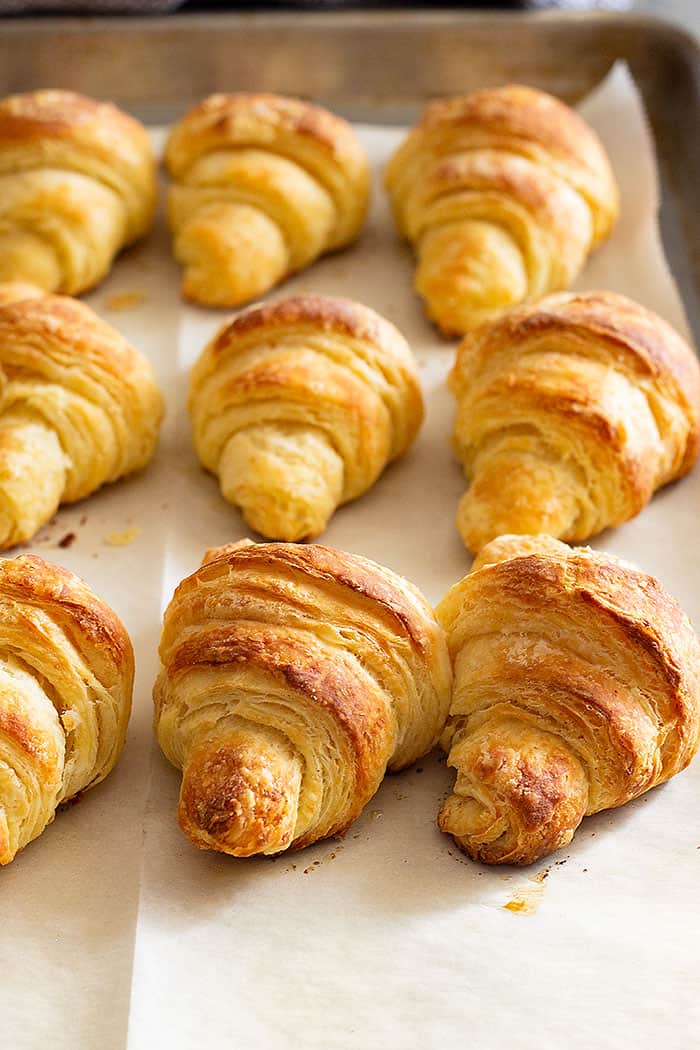
Crescent Rolls

These flaky homemade Crescent Rolls are so easy to make and a great addition to any meal! And they are much easier to make than croissants!

*Originally published November 2013. Photos, text, and recipe updated.*
Easy Flaky Crescent Rolls
Are you looking for a flaky crescent roll that’s easy to make?? Then this recipe is for you!
Most crescent roll recipes produce what I call a regular roll in crescent shape. There aren’t any flaky layers like what you get from that can of crescent roll dough from the store.
So I used my regular dinner roll recipe and put my biscuit technique to use. It gives lots of flaky layers so why not with yeast dough.
A few other great bread recipes you should try are: Flaky Buttermilk Biscuits, Buttermilk Cornbread, and Beer Bread.
Tips about these rolls:
- So, to make those flaky layers we need butter. When butter bakes it melts and releases steam making layers. It’s also what makes them crispy on the outside.
- The butter also needs to be cold. I wanted to make these rolls with the minimum amount of chilling time and found I could get away with chilling the dough only once.

- Also, I find using when cutting the butter into the flour mixture leave chunks that are a little larger than peas.
- Don’t use a cheese grater or food processor because the butter will just disappear into the dough when you work with it.
- Then you won’t get those nice flaky layers. It works with biscuits because the dough is being handled very little but with this dough, we are working it a little more and allowing it to rise.
Are crescent rolls and croissants the same?
In my opinion, they are not the same. For one croissants are a labor of love and take a lot longer to make and the technique is much different.
With croissants, you make what is called laminated dough which is the process of folding butter into the dough MANY times.
While these crescent rolls may be folding butter into the dough it’s done in a much easier way and takes much less time! Now that’s my kind of roll!!

Can these rolls be made ahead?
Yes, they can!! You can make the recipe through step four only instead of letting them rise in a warm place put them into the refrigerator for up to 24 hours.
If you choose to do this allow for the rolls to warm up and rise before baking which can take a couple of hours. Just be sure to leave them covered so they don’t dry out.
Crescent Rolls

Ingredients
- 3¾ cups (430g) all purpose flour
- ¼ cup (55g) sugar
- 1 tablespoon active dry yeast
- 2 teaspoon salt
- 1 cup (226g) very cold butter, cubed
- 1-1½ cups (240+ml) milk
- 2 large eggs
Instructions
- In a large bowl combine the flour, sugar, yeast, and salt. Using a pastry cutter cut in the butter until you have chunks a little larger than peas.
- In a small bowl combine the milk and eggs then stir into the flour mixture until it forms a ball. Start with 1 cup of milk and add more if necessary. If there is only a little flour left in the bowl I like to briefly knead the dough to finish bringing it together. If the dough is still pretty dry and having trouble coming together add in more milk. Wrap the dough in plastic wrap and chill for 30ish minutes.
- Dust a work surface with flour and divide the dough into 3 equal portions. Roll one portion into a long rectangle then fold into thirds. Turn dough a quarter turn and roll into another long rectangle and fold into thirds. Repeat once more. Roll into a rectangle about 1/4" thick (sometimes mine is a little thicker).
- Cut into 8 triangles. Starting at the wide end roll up each triangle and place on a baking sheet. Repeat with remaining 2 dough portions to make a total of 24 rolls. Cover rolls loosely and place in a warm area to rise until double in size.
- Preheat oven to 400 degrees F and bake for 10-12 minutes or until golden brown.
Video
Notes
- Make ahead option– You can make the recipe through step four only instead of letting them rise in a warm place put them into the refrigerator for up to 24 hours. Remove from refrigerator a couple of hours before baking.
- Storage– Store leftovers in an airtight container or plastic bag for up to 5 days.
- To Freeze– Freeze baked rolls in an airtight container or plastic bag for up to 2 months. Remove from freezer and defrost on the counter overnight.
- Nutrition Facts: Since different brands of ingredients have different nutritional information, the information shown is just an estimate.


I made these rolls sadly for Thanksgiving and now I have no rolls. No offense to the baker but they have zero flavor. It’s like eating flour. As much butter as the recipe requires you would think they would be flavored but there’s no flavor. Not even salt.
I am sorry you didn’t like the rolls! The brands of butter vary greatly for flavor. I prefer to use Kerrygold for the best flavor.