Homemade Dark Chocolate Truffles

Homemade Dark Chocolate Truffles are SO EASY to make! You can get those decadent and creamy ganache truffles at home with just a few simple ingredients.
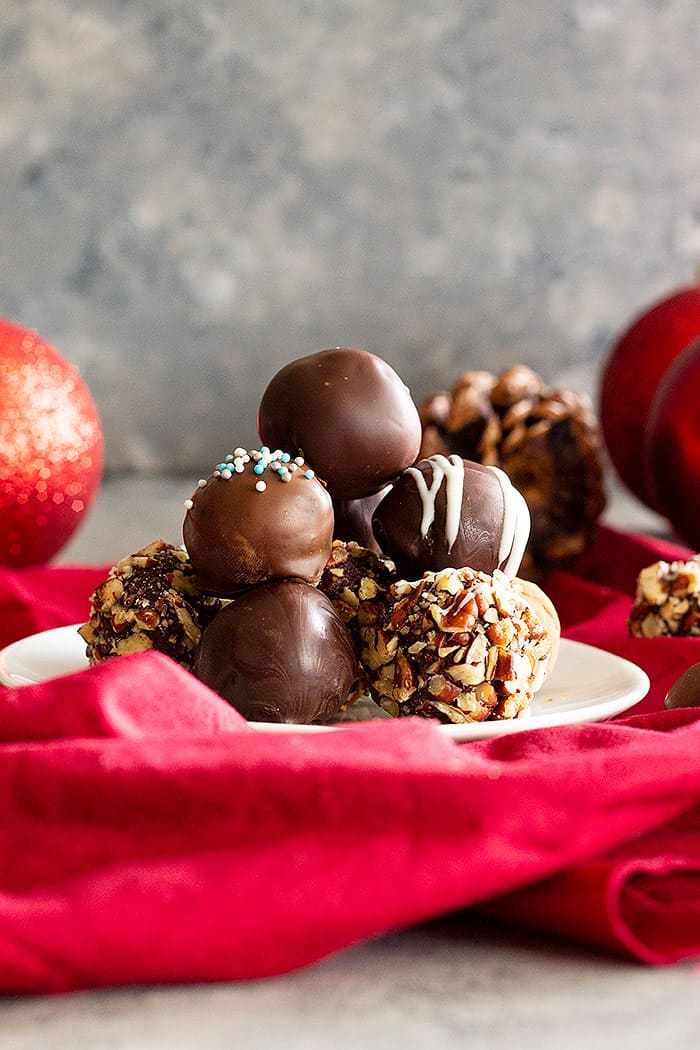
I have the easiest candy in the world to make for you…..indulgent dark chocolate truffles. They are creamy, rich, and show stopping! They would make a great gift for a loved one or anyone who loves chocolate!
Make a lovely gift package with these chocolate balls and add Homemade Dark Chocolate Hot Cocoa Mix, Peanut Butter Ritz Cracker Cookies, and these Sweet and Spicy Pecans. I know I wouldn’t object to a gift like that!
And why they charge so much for dark chocolate truffles is beyond me, because they require only a few simple ingredients: good quality chocolate, heavy whipping cream, butter, and vanilla.
You can even make ganache truffles without the butter and vanilla, but I have found that adding those two ingredients makes them that much better.
Why You’ll Love This Chocolate Truffle Recipe
- Rich and creamy
- Makes great gifts and costs a fraction of the price of boxed chocolates
- Super easy to make
- Gorgeous presentation
- Easy to add different toppings
Ingredients for Dark Chocolate Truffles
- CHOCOLATE – Since chocolate is the main ingredient, it is imperative to use good quality chocolate. No, chocolate chips are not allowed. They often have other ingredients added to harden them, so they aren’t suited for truffles. I suggest brands like Guittard, Lindt, and Ghirardelli. If you have a little extra in your budget, you can splurge on Scharffen Berger or Valrhona. Now, those are just a few brands and there are many more good options, so read below on how to choose good quality chocolate.
- HEAVY WHIPPING CREAM – Heavy cream can be labeled as heavy whipping cream or heavy cream. Look for one that is at least 30% milk fat.
- BUTTER – While this is an optional ingredient, it helps make the chocolate balls extra dreamy!
- VANILLA – Again, an optional ingredient, but makes them a little extra special.
How to choose quality chocolate
- First, I will say this…..it comes down to personal taste preference. I can say that one brand is the best, but that is because I like it and you may not. So follow these tips instead.
- Think of choosing chocolate much like people do when tasting wine. They often look at it, smell it, and then taste it. Choosing chocolate is similar.
- Look for chocolate that is shiny and free from any spots or blemishes. If the chocolate has a gray or cloudy look, it’s a sign that it’s old or has been in extreme temperature changes.
- Next, break the chocolate. The chocolate should snap with a clean break. If it bends or doesn’t give a good crisp snap, it’s a sign of poor quality chocolate, or it’s really old.
- Next, smell your chocolate. Close your eyes and take a deep breath. It should smell strongly of chocolate. If you are getting other odors, it could be inferior chocolate, or it has picked up odors from its surroundings.
- Finally, taste it. Close your eyes again and taste the chocolate. Let it melt in your mouth. What feeling does the chocolate leave in your mouth? Is it smooth and silky or waxy? If it leaves a greasy waxy feeling, it’s poor quality. Choose one that tastes good to you and has a smooth and silky mouthfeel. That is how you will end up with the best truffles dessert possible.
How To Make This Chocolate Truffle Recipe
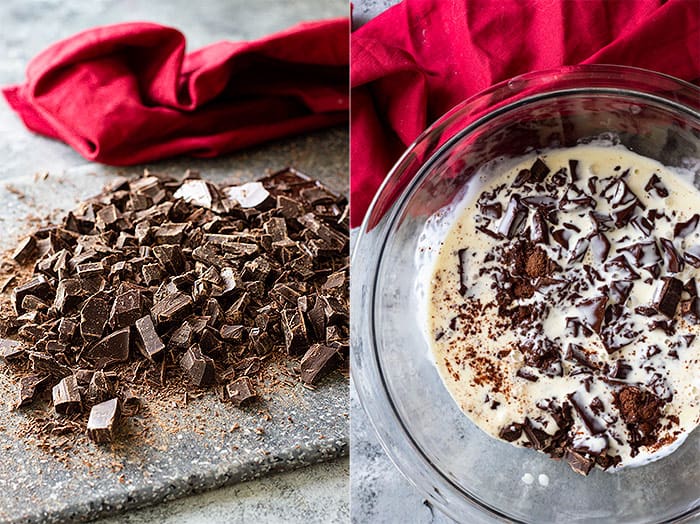
CHOP THE CHOCOLATE: Take a sharp knife and chop the chocolate so it’s very fine. Place inside a heatproof bowl. Add butter.
HEAT HEAVY CREAM: Place the heavy cream in a microwave-safe bowl and heat until it begins to bubble. (don’t overheat, or it will ruin the chocolate)
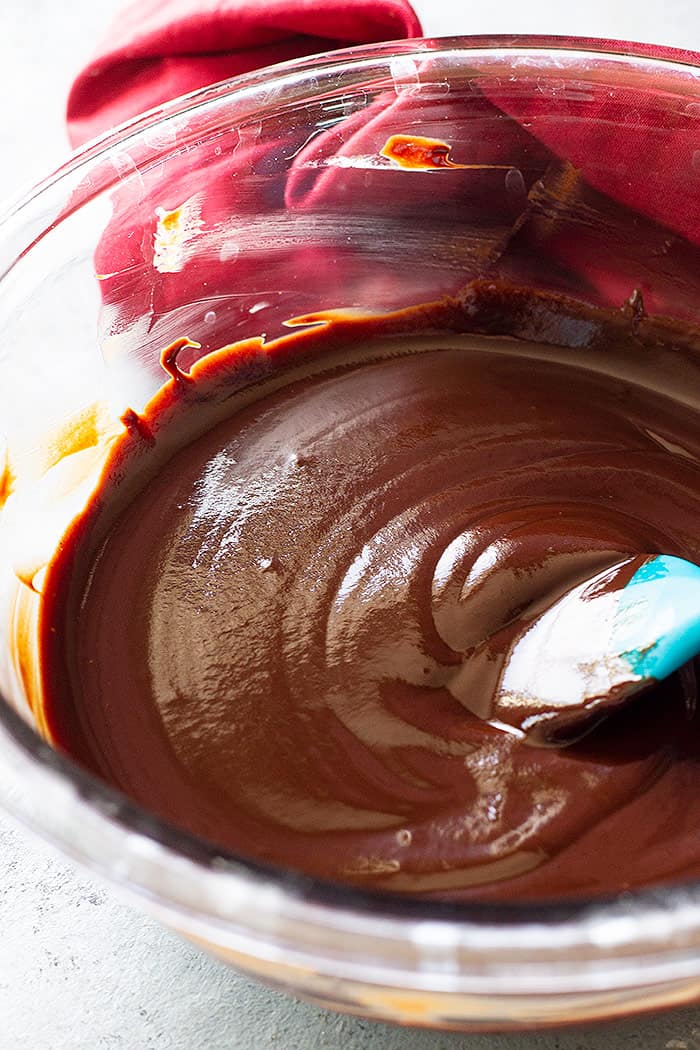
COMBINE INGREDIENTS: Gently pour the heavy cream over the chocolate and butter to form the ganache. Let it sit for 5 minutes, so the cream begins to melt the chocolate. Pour in the vanilla and stir until smooth and creamy. Cover and refrigerate for 1 hour.
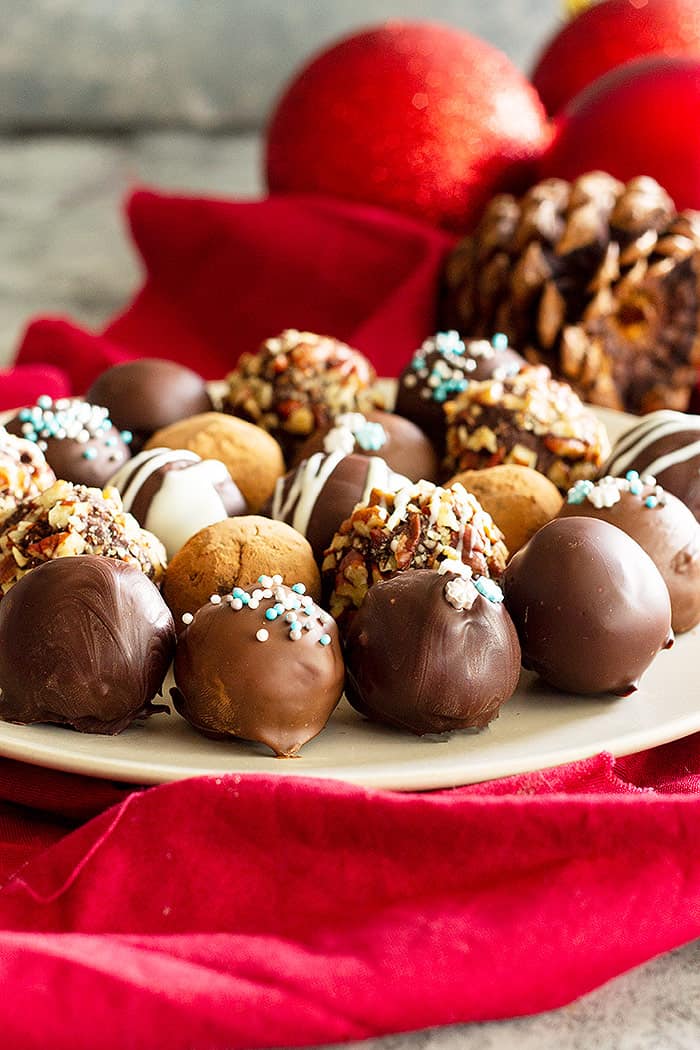
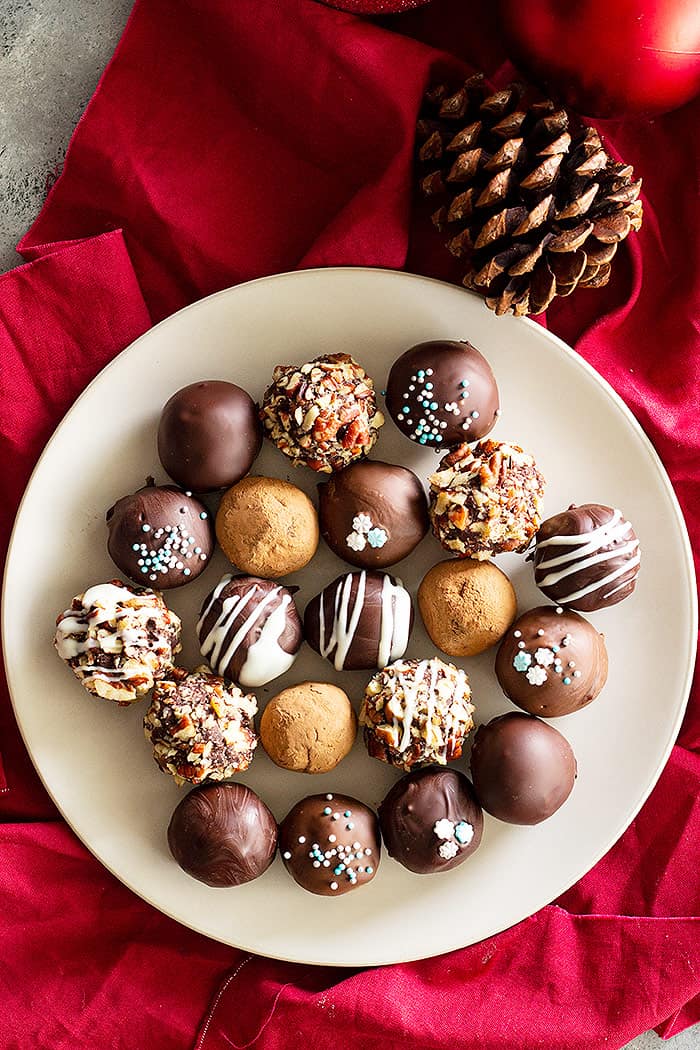
FORM CHOCOLATE BALLS: Using a small cookie scoop, form the chocolate balls. Add desired toppings, let set up, and serve.
Troubleshooting tips
- Chocolate looks greasy – If your chocolate ganache looks greasy and is separating, the cream was too hot. You want to heat the cream just until it starts to bubble and no more. If this does happen, you will have to start over, unfortunately.
- Chocolate is too hard to roll – Don’t sweat this one. Just leave it to sit at room temperature for a little bit, and it will soften.
- Too sticky to roll – I like to scoop all the chocolate balls first using a small cookie scoop (2 teaspoon size) and refrigerate them for about 15-20 minutes to firm them up. You can also use plastic food-safe gloves to help keep your hands clean.
Frequently Asked Questions
Do I have to use dark chocolate?
Nope! I like a darker chocolate because it makes the ganache truffles extra rich. You can also use white chocolate or milk chocolate if you’d like.
How do you make your truffles dessert look extra special?
- If you are wanting to present your truffles in a nice package, put each truffle into a small paper baking cup and a cute candy box.
- For a decorative look, roll the dark chocolate truffles in chopped nuts, sprinkles, or crushed candy. Or, dip them in melted chocolate.
- To dip them in melted chocolate, I found it best to place the truffle on a fork, then spoon the melted chocolate over the truffle or dip them into a deep container of melted chocolate. This gives that nice smooth outer coating. Carefully slide the truffle off the fork onto a piece of wax paper or parchment paper to dry.
- If you want to drizzle white chocolate over them, as I have done to some, dip them in melted chocolate and let them dry for at least 10 minutes. Spoon melted white chocolate into a sandwich bag and cut a tiny bit of the corner off. Gently squeeze the bag and drizzle across the tops of the truffles.
Can I make this chocolate truffle recipe for a crowd?
Absolutely! Each batch makes around 20 chocolate balls. So you can simply make as many batches as you need. They are excellent for family reunions, work parties, weddings, and holidays!
How long do ganache truffles last?
You can save the homemade chocolate truffles for up to 2 weeks when refrigerating them. Additionally, they last 5-6 months when frozen.
Ganache too soft to roll:
Your cream to chocolate ratio could be off. You can gently reheat the ganache stirring constantly (doing this over a double boiler is going to be best) and add a little more chocolate.
HUNGRY FOR MORE? Subscribe to my newsletter and follow along on Pinterest, Facebook, and Instagram for all my latest updates!
Homemade Chocolate Truffles
Ingredients
- 8 ounces (227g) good quality chocolate (use at least 60% cacao)
- 1 tablespoon unsalted butter
- ½ cup (120ml) heavy whipping cream
- ½ teaspoon vanilla
Instructions
- Finely chop the chocolate bars (this is important so it melts smoothly!) and place in a heatproof bowl. Add butter to the chocolate and set aside.
- Heat the heavy cream in a microwave-safe bowl just until it starts to bubble and no more. If you heat the cream to hot it will ruin the chocolate.
- Pour heated cream over the chocolate and butter and let sit for 5 minutes. Add the vanilla and stir until the chocolate is completely melted and smooth. Place a piece of plastic wrap over the chocolate pressing it against the surface of the chocolate. Refrigerate for 1 hour.
- Scoop the chocolate using a small cookie scoop (2 teaspoon size). Scoop all the chocolate first and place it into the refrigerator to harden a little if they are too soft to roll. If not roll into balls.
- Roll each into desired toppings.
Notes
- Storage- Store truffles at room temerature for up to 7 days. Store in the refrigerator for up to 3 weeks. Freeze for up to 3 months. To thaw place in the refrigerator.
- Always bring chocolate to room temperature before serving. Chocolate tastes best at room temperature.
- Nutrition Facts: Since different brands of ingredients have different nutritional information, the information shown is just an estimate. Nutrition not calculated with toppings.
- Please be sure to read the post about choosing quality chocolate, how to dress up the truffles, and other tips.


Disappointed the recipe didn’t specify sweetened chocolate. Way way too bitter!
She did. 60% caco IS “sweetend.”
I made a batch of milk chocolate and dark chocolate. The milk chocolate ones set up, although very sticky. The dark chocolate ones are too thin to hold shape once scooped out.
I am not sure why the dark chocolate wouldn’t set up other than maybe needing to chill longer. They will be sticky before rolling them in your desired toppings and that is so they are smooth and easy to bite when eating. Sorry they didn’t turn out as you had hoped.
Should the chocolate be sweetened or is it ok to use a good unsweetened chocolate bar?
I don’t recommend using unsweetened chocolate because there isn’t any other sweetener in this recipe. It will be too bitter. Let me know how you like them!
I attempted to make the dark chocolate truffles. I followed the recipe exactly put it in the bowl in fridge. It’s been over two hours and it looks like soup I don’t know what I did wrong. This was my first time
That is so odd! The only thing I can think of is maybe accidentally putting in too much cream. So sorry this happened!
I love truffles!! This recipe was perfect, thanks for sharing!
These were amazing! Thanks for the recipe and all the great tips!
I add liquer to them instead of vanilla, Delicious
That does sound extra yummy!!!
These are perfect for gifting! Love the variety of toppings.
Just these truffles alone would make a perfect party tray!
Thank you!
Hi Melinda, what temperature should the cream be before you add the chocolate please?
Hi! I don’t have a specific temperature to bring the cream up to. I just watch it and once it starts to bubble I stop heating it. Hope that helps and sorry I don’t have a specific temperature for you.