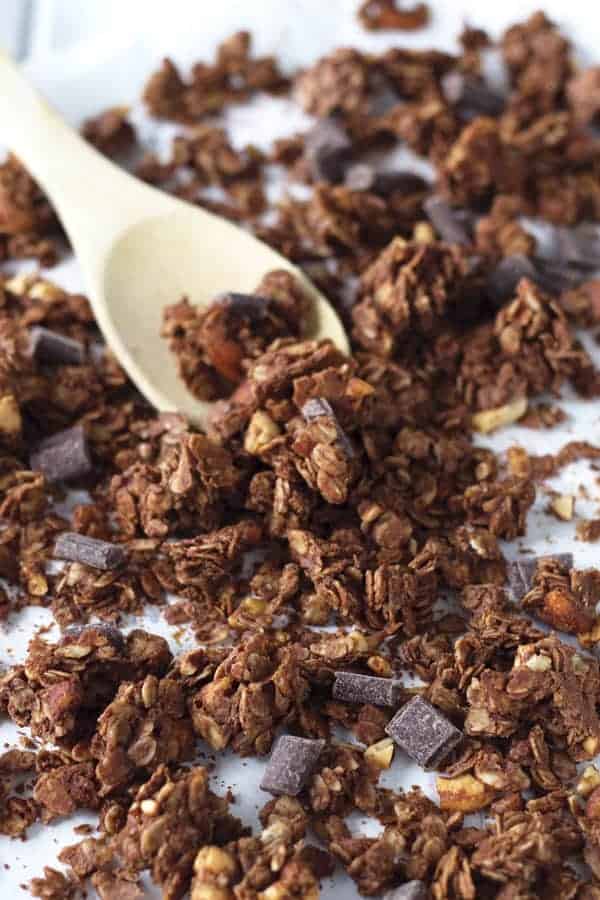
Homemade Honey Almond Granola
This Honey Almond Granola is a healthy homemade granola that’s so easy to make and budget-friendly! It uses simple ingredients right in your pantry and is great for brunch or breakfast. Top with a splash of milk or add it to your yogurt!
Honey Almond Granola
I love granola, and whenever I buy it, I can’t help myself from snacking! But, have you ever looked at the ingredients list and nutrition labels on store-bought options? The amount of sugar can be a little scary!
That’s why I prefer to make my own so I have full control over what I put into it. I’ve already shared recipes for Pumpkin Granola, Chocolate Peanut Butter Granola, and Maple Almond Granola, but I wanted to give you all an even more straightforward option.
This recipe for honey almond granola is very simple — meaning you can change things up to suit your specific needs! You likely have most, if not all, of the ingredients needed already on hand: oats, almonds, honey, and a handful of flavor-packed seasonings and extracts.
Make this almond granola recipe when the craving hits, and you won’t have to worry about all of that extra sugar!
Why You’ll Love Almond Granola
- Much more budget-friendly than store-bought
- Lower in sugar and more nutritious
- Packed with sweet, warm flavors
- Keeps for 4 weeks in the pantry, or up to 8 months in the freezer
- So easy to make

Key Ingredients to Make My Almond Granola Recipe
- OATS – I like old-fashioned the best. They provide a nice texture to any homemade granola and keep their shape.
- ALMONDS – Provide lots of crunch and flavor. Feel free to substitute in slivered or sliced almonds. Just use 1 cup instead of 2 cups.
- OIL – I like to use coconut oil, but use whatever oil you prefer. Oil helps make the granola nice and crisp, so don’t leave it out!
- HONEY – To sweeten the granola. Can use maple syrup too.
- SEASONINGS & EXTRACTS – Cinnamon, salt, vanilla, and almond extracts add so much flavor. Feel free to leave out the almond extract if it’s not your thing, but it really amps up the almond flavor. Don’t skimp on the salt. It’s essential for making the flavors shine in the final product.
Instructions to Make My Honey Almond Granola Recipe
RECIPE PREP: Preheat your oven to 350 degrees F and line a rimmed baking sheet with parchment paper.
COMBINE DRY INGREDIENTS: Add the oats, almonds, cinnamon, and salt to a large mixing bowl and mix to combine.
INCORPORATE THE WET INGREDIENTS: In a separate bowl, combine the oil, honey, vanilla, and almond extracts. Pour over the oats and almonds mixture and stir to evenly coat.

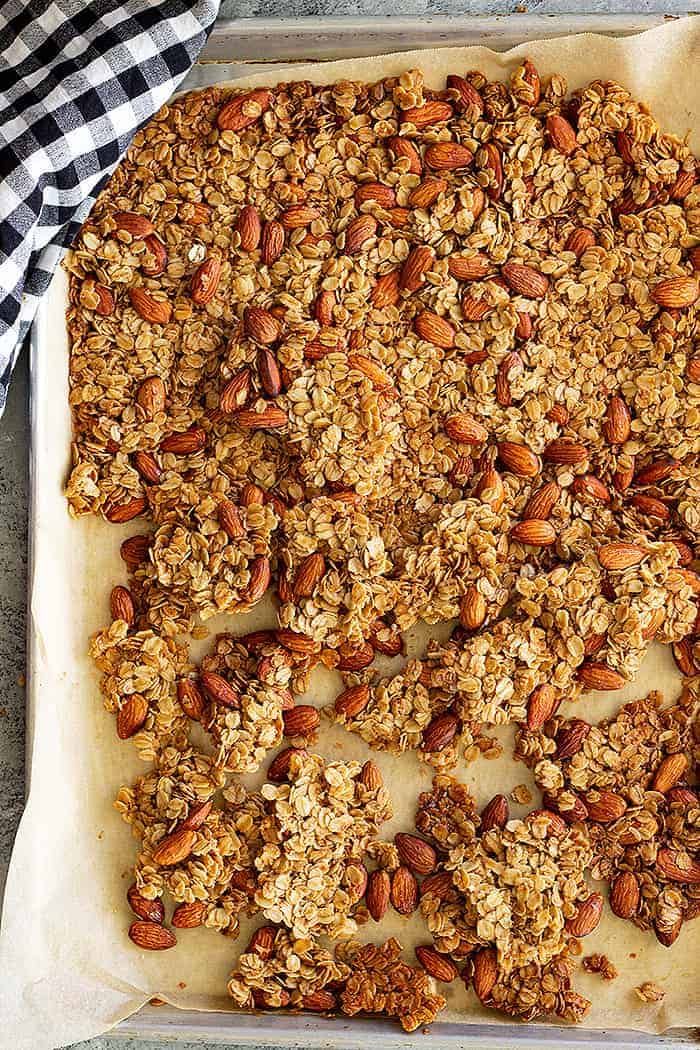
BAKE: Spread the granola in an even layer on the prepared baking sheet and lightly press. Bake for 15-20 minutes, or until the edges are lightly golden.
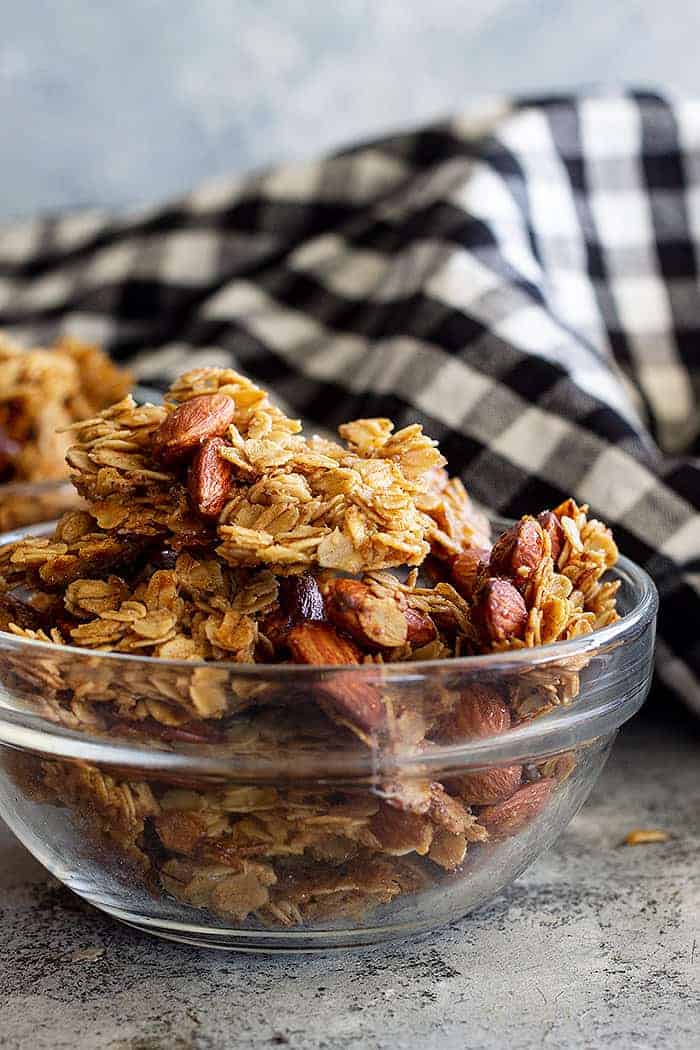
COOL: When it’s ready, remove the granola from the oven and let it cool completely, undisturbed, on the baking sheet. The less you touch it, the larger the clusters will be. When it’s cool, break it apart, and enjoy!
Fun Adaptions and Variations
- GLUTEN-FREE: Make sure your oats are certified gluten-free.
- VEGAN: Replace the honey with maple syrup.
- NUT-FREE: Replace the almonds with 1 cup of seeds instead.
- WITH DRIED FRUIT: Any dried fruit would go great in this almond granola. Add it once it’s cooled.
- MORE SPICES TO TRY: Nutmeg, clove, ginger, or allspice.
- ADD SHREDDED COCONUT: Use unsweetened coconut to help control sugar levels.
- WITH CHIA AND FLAXSEED: Great for extra nutrition and fiber.
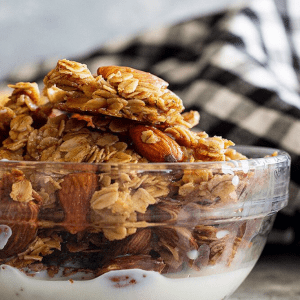
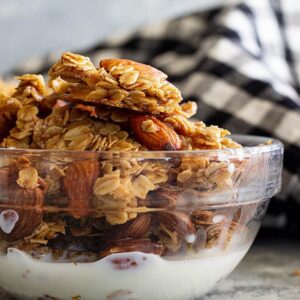
Serving Suggestions
There are a ton of options when it comes to honey almond granola! It tastes great on top of yogurt with fruit parfait style. You could also enjoy it in a bowl with your milk of choice like cereal. Or, on top of your morning oatmeal for some added crunch and flavor.
Don’t stop at breakfast! It’s wonderful as a mid-morning or mid-afternoon snack too. Or, add it to a tossed salad — like this Spinach, Apple, and Pomegranate Salad.
I’ve used it as an ice cream topping too, and as a filling in my Apple Peanut Butter Granola Sandwiches. It even makes for a great gift! The possibilities truly are endless.
FAQ
It’s not so much an ingredient that helps granola stick together, but a method! When your honey almond granola recipe is ready to pull out of the oven, resist the urge to dig in right away. Letting it cool completely will allow for larger clusters when you do break it apart. If you’re hoping for a TON of clusters, you may also consider adding some almond flour to the mix — it will act as a binder and hold the granola mixture together.
My almond granola recipe is great in moderation and isn’t packed with a whole bunch of excess sugar or other weird preservatives. Based on that, I’d say it’s pretty wholesome compared to most store-bought options! That said, I’m not a doctor. You should always consult a health professional to determine whether something is good for you or not.
It lasts for quite a while! My almond honey granola recipe in particular will keep for up to 4 weeks in the pantry, up to 4 months in the fridge, and up to 8 months in the freezer.

Pro Tips for Large Granola Clusters
- Be sure to line the pan with parchment paper so the sweetener sticks to the oats and not the pan.
- Lightly press the honey almond granola into an even layer before baking.
- Don’t stir during baking.
- Bake just until lightly golden around the edges and no longer. Your granola will look wet and not crisp, but as it cools, it will dry and crisp up beautifully.
- Don’t touch the granola until it has cooled COMPLETELY! This is probably the most important step!
More Easy Breakfast Recipes To Try
- Berry Baked Oatmeal
- Apple Cinnamon Freezer Oatmeal Cups
- Almond Granola Bars
- Fluffy Buttermilk Pancakes
Thanks so much for reading! Let me know what you think about this almond honey granola recipe!
HUNGRY FOR MORE? Subscribe to my newsletter and follow along on Pinterest, Facebook, and Instagram for all my latest updates!
Homemade Honey Almond Granola
Ingredients
- 4 cups (400g) old fashioned oats
- 2 cups (310g) almonds
- 1½ teaspoons ground cinnamon
- ¼-½ teaspoon salt
- ½ cup (120ml) oil of choice (I like to use melted coconut oil)
- ⅓ cup (80ml) honey
- 1 tablespoon vanilla
- ¼-½ teaspoon almond extract, optional but delicious!
Instructions
- Preheat oven to 350°F. Line a large rimmed baking sheet with parchment paper; set aside.
- In a large mixing bowl combine the oats, almonds, cinnamon, and salt. In a seperate bowl combine the oil, honey, vanilla, and almond extract. Pour over oats and stir well to ensure everything is coated well.
- Spread in an even layer on prepared pan and lightly press down. Bake for 15-20 minutes or until lightly golden around the edges.
- Remove from oven and cool completely on teh pan without stirring for large clusters.
Notes
- Store in an air tight container in your pantry for up to 4 weeks, refrigerator for up to 4 months, and in your freezer for up to 8 months.
- Nutrition facts: Since different brands of ingredients have different nutritional information, the information shown is just an estimate.


Followed the directions to the letter. For some reason it burned super badly. Had to toss out most of it.
I am so sorry that happened! The only thing I can think of to cause that is maybe your oven cooks really hot. By chance do you have an oven thermometer? Again so sorry, I know that is frustrating to throw away food!
My oven actually cooks lower than it says. I put it o. The bottom shelf because the oven was also cooking something else so maybe that did it. The parts that weren’t burned were delicious.
I am so glad you have an oven thermometer! So many people don’t! I am sorry we can’t pinpoint what could have caused the issue. My oven likes to burn things if I use the lower shelves so maybe that is the same for you.
So simple to put together and great snack for my kids1
Thanks! My kids love this as an afternoon snack too!
So good in a parfait! Love the light vanilla flavor.
Yes, this is so good in a parfait!! Thank you!!
The kids loved this! And I loved that it was simple to throw together and an easy snack for them. Thanks for the recipe!
Thank you so much! So glad you liked it!
Love this as a simple breakfast! My son and I couldn’t get enough!
Thank you so much!